Barcode Verification vs Barcode Scanning: How to Prevent Unreadable Labels
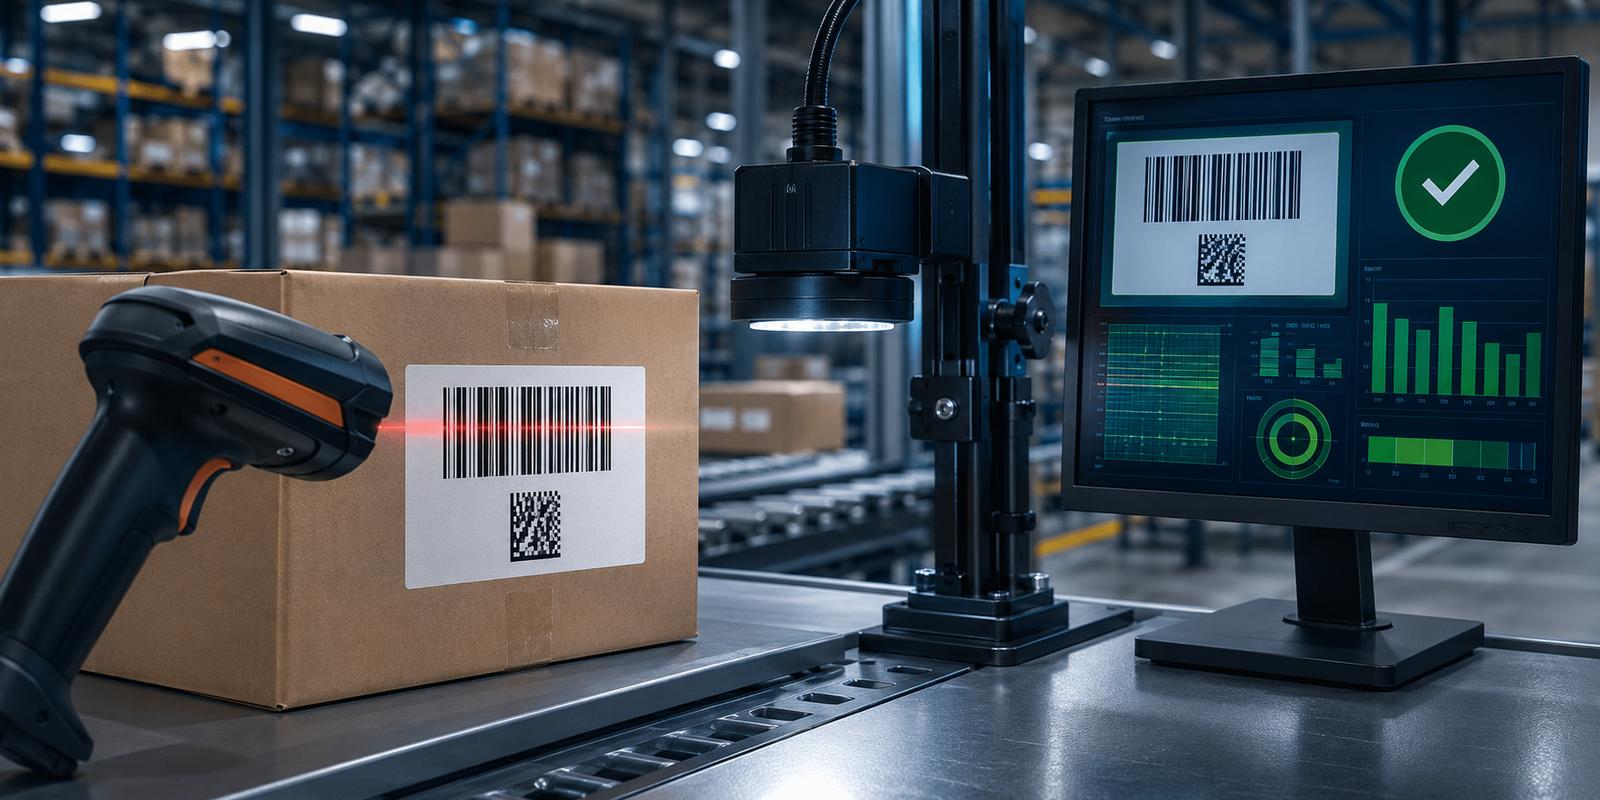
A barcode that scans once is not necessarily a good barcode. It may decode on the scanner beside the printer yet fail on a different reader, at a longer distance, through stretch wrap, after abrasion, or at a customer receiving dock. That distinction is the heart of barcode verification vs barcode scanning: a scanner confirms that one device can decode the symbol under one set of conditions, while a verifier measures print quality under controlled conditions and assigns a repeatable grade.
For warehouses, manufacturers, co-packers, and distribution operations, unreadable labels create more than a momentary inconvenience. They can trigger manual data entry, receiving delays, rejected shipments, rework, inventory errors, chargebacks, and lost traceability. A structured verification program finds weak symbols before they move downstream.
Quick answer
Use a scanner to test workflow and decode performance. Use a barcode verifier to measure and document print quality. If a label must meet a customer, industry, or internal quality specification, a successful scan is not a substitute for a verification report. Start with the required symbology, application standard, minimum grade, measurement location, and reporting rules; then select a calibrated verifier that supports them.
Explore barcode verifiers, or contact AutoID Warehouse for help matching the verifier, printer, label material, and inspection workflow to your application.
In this guide
Barcode verification vs barcode scanning at a glance
Scanning and verification are complementary controls, not competing versions of the same test. A scanner is designed to capture data quickly. A verifier is designed to measure the physical characteristics that make a symbol reliably readable across a supply chain.
| Question | Barcode scanner | Barcode verifier |
|---|---|---|
| Primary purpose | Capture encoded data during an operational transaction | Measure and grade symbol quality |
| Typical result | Decode/no decode, plus the decoded data | Overall grade, parameter grades, decoded data, and a report |
| Test conditions | Depend on the scanner, angle, distance, optics, software, and ambient light | Controlled geometry, illumination, aperture, calibration, and selected standard |
| Calibration | Normally not calibrated as a print-quality instrument | Calibrated with a traceable conformance standard or calibration target, as specified by the manufacturer |
| Standards-based grade | No | Yes, when the device and configuration support the applicable method |
| Best warehouse use | Receiving, picking, packing, shipping, inventory, and workflow testing | Printer setup, quality audits, supplier checks, root-cause analysis, and compliance records |
| Main limitation | A pass can conceal low print-quality margin | A grade only has meaning with the correct standard, setup, and application requirement |
A useful rule is simple: scanning asks, “Can I read it now?” Verification asks, “How much quality margin does this symbol have, and why?”
What a barcode scan test proves—and what it misses
Scanning is an essential operational test. It confirms that the reader can locate the symbol, decode it, and deliver data to the host application. It can also expose workflow problems such as a wrong symbology setting, an unexpected prefix or suffix, poor scanner placement, a damaged label, or an incorrect data string.
However, the result is specific to the equipment and conditions used. A modern imager may decode a marginal symbol using aggressive image processing, while an older laser scanner or a high-speed fixed reader cannot. A scan at six inches may work while a scan from a forklift does not. A pristine label may pass immediately after printing but fail after condensation, abrasion, ultraviolet exposure, or stretch wrapping.
Why repeated successful scans still do not create a grade
Scanning a label 10 or 100 times can help assess a local process, but the result remains tied to that scanner. It does not measure symbol contrast, modulation, decodability, print growth, grid distortion, or other standardized characteristics. It also does not establish controlled illumination or a calibrated optical reference.
A high first-pass read rate is valuable operational data, especially when tracked across receiving, picking, and shipping. It is not interchangeable with a standards-based verification grade. Use scanner performance data to monitor the workflow and verifier data to monitor label quality.
When a scanner is the right tool
- Testing whether labels work with the actual handheld, wearable, vehicle-mounted, or fixed scanners in the facility
- Confirming that the decoded data reaches the warehouse management system correctly
- Validating scan distance, angle, motion, lighting, and operator ergonomics
- Monitoring no-read rates at each operational station
- Finding damaged labels that need immediate reprinting
For reader selection, see our guides to barcode scanners vs mobile computers, fixed-mount vs handheld scanners, and building a warehouse barcode scanning system.
What barcode verification measures
A barcode verifier captures the symbol under defined optical conditions, analyzes its measurable characteristics, and reports the results according to a selected methodology. Instead of providing only a pass or fail, it identifies which quality parameter limits the symbol.
That diagnostic detail matters. Two labels can both fail to scan, yet require completely different fixes. One may have insufficient contrast because the ribbon and synthetic label are poorly matched. The other may have excessive bar growth because printer darkness is too high. A verifier helps separate symptoms from causes.
A meaningful verification report should identify the test context
Do not evaluate a report from the headline grade alone. Depending on the application and equipment, the record should identify items such as:
- Symbology and decoded data
- Applicable ISO/IEC method and application specification
- Overall grade and individual parameter grades
- Aperture, wavelength or illumination method, and magnification or X-dimension
- Inspection date, verifier identity, software version, and operator
- Calibration status
- Label, printer, media, ribbon, production line, batch, or work-order identifiers
A grade without this context can be misleading. The same symbol may receive a different result when evaluated with another aperture, illumination, or application profile. Verification must reproduce the method required by the symbol and its trading environment.
The standards behind barcode verification
Verification programs typically combine an ISO/IEC print-quality methodology with an application specification that defines how a barcode must be created and what result is acceptable. The application specification may come from a customer, an industry body, a regulated workflow, or an internal quality standard.
| Standard or guidance | Primary use | Why it matters |
|---|---|---|
| ISO/IEC 15416:2025 | Linear barcodes | Defines measurement and grading of attributes that influence the scan performance of 1D symbols. |
| ISO/IEC 15415:2024 | Two-dimensional symbols | Defines measurement and grading methods for multi-row and matrix symbols. |
| ISO/IEC 29158:2025 | Direct part marks | Adapts 2D quality measurement for DPM characteristics and alternative illumination. |
| GS1 Barcode Verification Process Implementation Guideline | Verification process design | Explains consistent testing of symbol quality and the integrity of encoded data in GS1 applications. |
These are current editions as of August 2026. A verifier does not automatically make every test compliant with every specification. Confirm that the hardware, software licence, illumination, field of view, calibration procedure, and reporting format support the exact code and requirement in your operation.
Print-quality standard vs application specification
The print-quality standard explains how to measure. The application specification explains what to print and what is acceptable. It may define the symbology, data format, size, quiet zones, placement, minimum grade, aperture, or inspection point. This is why there is no universal statement such as “Grade C always passes.” The required result must come from the applicable specification or customer agreement.
How barcode grades work
Verification results are commonly displayed on a numeric scale from 4 to 0 and an equivalent letter scale from A to F. The overall symbol grade is often constrained by the lowest individual parameter grade, although the precise calculation and scan aggregation depend on the applicable method.
| Numeric grade | Letter equivalent | Practical interpretation |
|---|---|---|
| 4 | A | High measured quality margin under the stated test conditions |
| 3 | B | Strong result, subject to the application requirement |
| 2 | C | Moderate margin; acceptable only if the application specification allows it |
| 1 | D | Low margin and commonly below requirements |
| 0 | F | Failed measurement or decode under the verification method |
The table is an interpretation aid, not an acceptance specification. If a customer requires 2.5 or better at a defined aperture, then a 2.0 is a failure even though it maps to a C. If an internal process target is higher than the contractual minimum, the higher target can provide early warning before output reaches the rejection limit.
Measure trend, not only pass/fail
A production run that declines from 3.8 to 2.6 may still be passing, but the trend signals deteriorating conditions. The printhead may be accumulating residue, the ribbon roll may have changed, or media coating may vary. Trending the overall grade and limiting parameter makes preventive maintenance possible before failures occur.
What barcode verifiers measure on 1D and 2D codes
Common linear barcode quality parameters
For linear symbols evaluated under ISO/IEC 15416, the report can include the following characteristics:
- Decode: whether the reference decode algorithm can interpret the symbol.
- Symbol contrast: the reflectance difference between the lightest space and darkest bar.
- Minimum reflectance: whether the darkest bar is sufficiently dark relative to the light background.
- Minimum edge contrast: the weakest reflectance transition between an adjacent bar and space.
- Modulation: how consistently the narrow elements retain contrast compared with the symbol’s maximum contrast.
- Defects: voids in bars, spots in spaces, blemishes, or other reflectance irregularities.
- Decodability: how accurately the printed element widths match the symbology’s ideal pattern.
The verifier may also evaluate dimensions, quiet zones, check characters, data formatting, or application identifiers when supported by the device and selected application profile. These checks are important, but they should not be confused with the raw optical grade.
Common 2D barcode quality parameters
For matrix and multi-row symbols evaluated under ISO/IEC 15415, reported parameters can include:
- Decode: whether the reference process can decode the symbol.
- Symbol contrast: the reflectance separation between light and dark modules.
- Modulation or reflectance margin: the margin of individual modules relative to the global threshold.
- Fixed pattern damage: damage to finder, timing, alignment, or other fixed structures.
- Axial nonuniformity: unequal scaling along the symbol’s axes.
- Grid nonuniformity: displacement of module centers from their ideal grid.
- Unused error correction: the remaining error-correction capacity after symbol damage is accounted for, where applicable.
The exact parameters depend on the symbology and verification method. A Data Matrix problem caused by grid distortion is not solved the same way as a linear code problem caused by quiet-zone infringement.
Direct part marks need a DPM-capable method
Laser-etched, dot-peened, cast, or chemically marked codes behave differently from printed labels. Surface texture, curvature, specular reflection, low contrast, and cell shape may require alternative illumination. For suitable 2D direct part marks, ISO/IEC 29158 modifies the ISO/IEC 15415 approach. Select a verifier and lighting configuration explicitly designed for the mark, part geometry, and required standard.
Why barcode labels become unreadable
Unreadable labels usually result from a combination of design, printing, material, application, and environmental factors. The fastest corrective action begins with the verifier’s limiting parameter, followed by inspection of the physical label and production settings.
| Observed symptom | Likely causes | Corrective actions |
|---|---|---|
| Low contrast | Ribbon/media mismatch, translucent stock, colored background, insufficient print energy, reflective laminate | Test a compatible ribbon and facestock, increase darkness carefully, add an opaque blockout layer, or change overlaminate |
| Bars or modules spread together | Excess heat, slow speed, ink spread, excessive pressure, unsuitable print process | Reduce darkness or dwell, tune speed and pressure, compensate design only through a controlled print process |
| Broken bars or missing modules | Dirty or damaged printhead, ribbon wrinkle, debris, insufficient heat, surface texture | Clean and inspect the printhead and platen, reseat the ribbon and media, raise energy within material limits |
| Poor modulation | Small elements, print gain, low resolution, optical blur, inconsistent ink transfer | Increase X-dimension, use suitable printer resolution, tune darkness/speed, improve media-ribbon compatibility |
| Quiet-zone failure | Text, borders, graphics, label edge, or adjacent print too close to the symbol | Correct the template and preserve the required clear area around the code |
| Grid or axial distortion | Unequal scaling, artwork resizing, printer mechanics, curved application surface | Print at native dimensions, lock aspect ratio, service mechanics, increase symbol size, reconsider placement |
| Passes at printer, fails later | Abrasion, chemicals, moisture, heat, sunlight, flexing, wrinkles, stretch-wrap glare, applicator damage | Test after conversion and application, upgrade adhesive/facestock/ribbon, protect or relocate the label |
| Correct grade, wrong data | Template mapping, database, serialization, check-digit, or application identifier error | Validate encoded content against the source system and enable the correct application profile |
Printer settings are a balance, not a “more darkness is better” control
Too little energy produces pale or incomplete elements. Too much energy can widen bars, close narrow spaces, round 2D modules, and shorten printhead life. Print speed, darkness, head pressure, ribbon chemistry, media coating, printer resolution, and symbol size interact. Change one controlled variable at a time, verify several samples, and record the approved settings.
Design for the real production process
A symbol that is technically correct in artwork can become marginal when rendered at the printer’s dot grid. Avoid resizing barcode images in office or design software. Generate the symbol at the final dimensions, maintain quiet zones, use an X-dimension appropriate for the print resolution and scan distance, and confirm that human-readable text or borders do not encroach.
For print-platform selection, review barcode label printer solutions for warehouses and our range of industrial label printers.
Verify at the point where quality matters
Checking only immediately after printing can miss damage caused by die cutting, lamination, application, packaging, handling, or environmental exposure. If the contractual requirement applies to the finished case or item, include samples after the final relevant operation. For incoming labels, verify representative samples before releasing the lot to production.
Offline vs inline barcode verification
The right deployment depends on volume, risk, automation level, and the cost of an escape. Many operations use both: an offline verifier for setup and detailed investigation, plus an inline system for continuous production monitoring.
| Consideration | Offline verifier | Inline print inspection |
|---|---|---|
| Inspection method | Operator places or presents a sample to the verifier | System inspects labels as they are printed or pass the camera |
| Coverage | Setup pieces and statistically or risk-based samples | Potentially every label, subject to system and line design |
| Best fit | Multiple printers, incoming inspection, audits, investigations, lower volumes | High-volume or high-risk serialized and production printing |
| Diagnostic work | Excellent for close inspection and controlled retesting | Excellent for real-time detection and production trend data |
| Integration | Usually simpler; reporting may be local or networked | Requires printer/line integration, job logic, alerts, and reject or reprint handling |
| Operational risk | A sampling plan can miss intermittent defects | Poor configuration can create false accepts, false rejects, or unmanaged line stops |
Inline inspection is not “install and forget.” It needs controlled job configuration, calibration or performance checks, cleaning, preventive maintenance, data retention, and a defined response when a label fails. The line must know whether to stop, alert, void, reject, or reprint—and how to prevent a failed serialized label from being used.
How to build a barcode verification program
1. Define the requirement before buying equipment
List each barcode by symbology, size, substrate, print method, product or package level, customer, and destination. Record the applicable standard or customer specification, minimum grade, aperture or measurement condition, inspection point, and report retention period. If a requirement is unclear, obtain written confirmation rather than adopting a generic threshold.
2. Match the verifier to the symbol and sample
Confirm supported symbologies, field of view, minimum and maximum element size, illumination, printed-label or DPM capability, reporting software, calibration method, computer requirements, and licence options. Also consider how the operator will position a large carton, flexible pouch, curved item, or heavy component.
3. Establish calibration and performance checks
Follow the manufacturer’s procedure and interval using the supplied or specified calibration target. Protect the target from dirt, scratches, fading, and unauthorized replacement. Record calibration status and prevent production approval when the verifier is overdue or fails its check.
4. Approve the label design and print recipe
Verify representative labels from the actual printer, media, ribbon, resolution, speed, darkness, and applicator combination—not just a PDF proof. Record the approved template version and settings. When multiple printers are used, qualify each device because mechanical condition and dot alignment vary.
5. Verify at startup and after changeovers
Inspect the first acceptable pieces after a job setup, printer maintenance, media or ribbon change, printhead replacement, software update, template revision, or supplier-lot change. The goal is to catch systematic errors before volume accumulates.
6. Use a risk-based sampling plan
Sampling frequency should reflect production volume, process capability, defect history, downstream detectability, customer requirements, and the cost of failure. There is no single sampling interval appropriate for every warehouse or print line. Increase checks during new-product introduction, unstable processes, material changes, or after a failing trend.
7. Retest after the final damaging process
If labels are laminated, applied around a curve, exposed to heat, or handled by an applicator, verify finished samples. For reusable totes or long-life asset labels, add aging and cleaning tests that reproduce the expected service environment.
8. Record both grades and limiting parameters
Store the report with the job, batch, printer, material, operator, time, and corrective action. Trend the overall grade and the lowest parameter. This turns verification from a release gate into a process-control tool.
9. Create a clear failure response
- Stop or contain the affected output.
- Confirm verifier setup, calibration status, and correct application profile.
- Inspect the physical label and identify the limiting parameter.
- Change one process variable at a time.
- Verify multiple new samples, including samples across the web or label position.
- Define the affected time window and disposition printed inventory.
- Document the root cause, correction, and prevention action.
10. Continue testing with production scanners
Verification does not eliminate operational validation. Test approved labels with the actual barcode readers, distances, motion, mounts, lighting, and software used on the floor. A well-graded code can still be difficult to capture if it is placed behind a reflective surface, outside the reader’s depth of field, or in an inaccessible position.
Barcode verifier options for different workflows
The correct product depends on the symbols, dimensions, standards, surface, throughput, and reporting requirements. AutoID Warehouse lists desktop, portable, and integrated print-inspection options. Availability and exact configurations can change, so confirm the required model and licences before ordering.
Omron LVS-9510 desktop barcode verifier
The Omron LVS-9510 desktop tester is suited to controlled offline inspection of printed 1D and 2D symbols. Its desktop presentation and available field-of-view configurations make it useful for print rooms, quality laboratories, incoming label inspection, and root-cause work. Confirm the field of view and software options against the largest label and required application standards. See also the manufacturer’s LVS-9510 product information.
Omron LVS-9585 portable verifier
The Omron LVS-9585 manual tester supports portable verification where samples cannot be brought easily to a desktop station. It is relevant for printed symbols and appropriately configured direct part mark applications. Before selection, confirm the required illumination, field of view, stand or presentation method, and standard. Review the official LVS-9585 information for configuration details.
Omron LVS-9580 handheld configurations
The Omron LVS-9580 manual tester family offers handheld verification configurations for applications that benefit from taking the instrument to the code. Verify compatibility with the exact symbology, X-dimension, viewing area, surface, and reporting requirement rather than selecting by portability alone.
Omron V275 integrated print inspection
For production environments that need continuous inspection, an integrated system such as an Omron V275 print-inspection configuration can combine with supported industrial printer setups, including specified Zebra ZT610 or ZT620 configurations. The project must account for label dimensions, print speed, printer model, communications, data validation, failure handling, and reporting. Consult the official Omron V275 information and confirm the exact AutoID Warehouse part number before purchase.
Selection questions to ask
- Which 1D, 2D, postal, stacked, or DPM symbologies must be inspected?
- Which ISO/IEC method and application specifications must the report support?
- What are the smallest X-dimension and largest overall symbol?
- Is the sample flat, curved, reflective, recessed, flexible, or difficult to position?
- Do you need offline sampling, portable inspection, or 100% inline monitoring?
- Must the system validate encoded data, application identifiers, or serialization?
- How will reports be named, exported, retained, and tied to production records?
- What happens automatically after a failure?
The business case: prevention costs less than downstream failure
The cost of a verifier should be compared with the full cost of poor labels. That includes operator time spent rescanning or keying data, reprints, relabeling, production stoppages, quarantined inventory, expedited freight, customer claims, chargebacks, and traceability investigations.
A simple business-case model is:
Annual avoidable cost = failure incidents × average labor and material cost + chargebacks + downtime + lost-product or shipment cost.
Add the value of earlier diagnosis. Without parameter-level measurements, a team may replace scanners, adjust templates, change ribbons, or increase darkness by trial and error. Verification narrows the cause and creates evidence that suppliers and customers can evaluate consistently.
Inline systems may justify themselves where each failed serial number, medical label, automotive mark, or outbound pallet creates high risk. Offline systems may provide the best return where a trained quality operator can control several print stations through setup approval and targeted sampling.
Common barcode verification mistakes
- Using a premium scanner as a verifier: better decoding still does not create standardized measurements.
- Accepting any C grade: the minimum must come from the applicable specification and test condition.
- Choosing the wrong aperture or profile: the number is not comparable to the required result.
- Ignoring encoded data: excellent print quality cannot correct a wrong item number, lot, date, or check digit.
- Testing only the first label: heat, dirt, ribbon wrinkle, and mechanical drift can emerge during the run.
- Testing only before application: packaging and environmental exposure may cause the actual failure.
- Changing several printer variables at once: the team cannot identify which change fixed or worsened the problem.
- Keeping no reports: isolated grades cannot show trends, prove release, or support root-cause analysis.
- Neglecting calibration and cleaning: an uncontrolled instrument undermines repeatability.
Unreadable-label prevention checklist
- Document the symbology, data rules, size, quiet zone, placement, and minimum grade.
- Use barcode-generation software that preserves native dimensions and aspect ratio.
- Match printer resolution and X-dimension.
- Qualify the media, ribbon or ink, adhesive, and protective material together.
- Create locked printer recipes for darkness, speed, and pressure where supported.
- Clean printheads and platen rollers on a defined schedule.
- Calibrate the verifier and protect its calibration target.
- Verify startup samples, changeovers, and risk-based in-process samples.
- Inspect after label application or environmental exposure when relevant.
- Trend the overall grade and limiting parameter by printer and material lot.
- Test approved labels with the actual production scanning system.
- Contain failures and document corrective action before releasing output.
Final recommendation
The choice in barcode verification vs barcode scanning is not either/or. Reliable operations need both controls. Scanners prove that real workflows can capture data; verifiers prove that the symbol has measurable print-quality margin under a defined method.
Begin with the application requirement, then select the verification method and equipment. Establish calibrated measurements, approve the complete printing recipe, inspect at risk-based intervals, trend weak parameters, and validate finished labels with the readers used on the floor. That combination prevents unreadable labels from becoming expensive warehouse or customer problems.
Need help choosing an offline, portable, or integrated verification system? Browse barcode verifiers at AutoID Warehouse or contact our identification specialists with your symbology, label size, printer, material, required standard, and production volume.
Frequently asked questions
What is the difference between barcode verification and barcode scanning?
Barcode scanning confirms that a particular reader can decode a symbol under the current conditions. Barcode verification measures print-quality parameters under controlled, calibrated conditions and produces a grade based on a selected standard and application profile.
Can I use a barcode scanner to verify barcode quality?
No. A scanner is valuable for workflow and read-performance testing, but it is not a calibrated print-quality instrument. Even repeated successful scans do not produce the standardized measurements or reports supplied by a barcode verifier.
Does a barcode that scans successfully always pass verification?
No. A high-performance scanner may decode a symbol with low quality margin, while verification can identify weak contrast, modulation, decodability, defects, or dimensional problems. The symbol may scan locally and still fail the required verification grade.
What barcode grade is considered passing?
There is no universal passing grade. The minimum grade and measurement conditions must come from the relevant customer, industry, regulatory, or internal application specification. A C grade may be acceptable in one application and fail another.
Which standard applies to 1D, 2D, and direct part mark barcodes?
ISO/IEC 15416 is used for linear barcode print quality, ISO/IEC 15415 for 2D symbols, and ISO/IEC 29158 for suitable 2D direct part marks. An application specification may add data, size, placement, grade, and reporting requirements.
How often should barcode labels be verified?
Use a documented risk-based plan. Verification commonly occurs at job setup, after material or equipment changes, at defined intervals during production, and after processes that may damage the label. High-risk or high-volume workflows may require inline inspection of every label.
Should I choose an offline or inline barcode verifier?
Choose an offline verifier for setup approval, sampling, audits, incoming inspection, and detailed troubleshooting. Choose inline inspection when production volume or escape risk justifies continuous monitoring. Many operations use both approaches.
Why does a barcode pass at the printer but fail in the warehouse?
The label may lose quality through abrasion, moisture, heat, chemicals, wrinkles, applicator damage, curved placement, or reflective packaging. It may also be scanned at a different distance or angle. Verify after the final relevant process and test with the actual warehouse readers.